Introduction:
It’s à la mode again this time more to musicians and hi-fi. The demand is growing, musicians and music lovers both are victims of the ease of using the warm, rich sound can’t be beat without vacuum tubes. Constructing a DIY tube amplifier isn’t just fun — it’s the smart means of getting your own personalized sound and, while doing so, saving money. Plus, learning how these amps work can boost your skills and confidence. In this guide, you’ll see how to pick schematics, gather parts, and assemble your own tube amp — step by step.
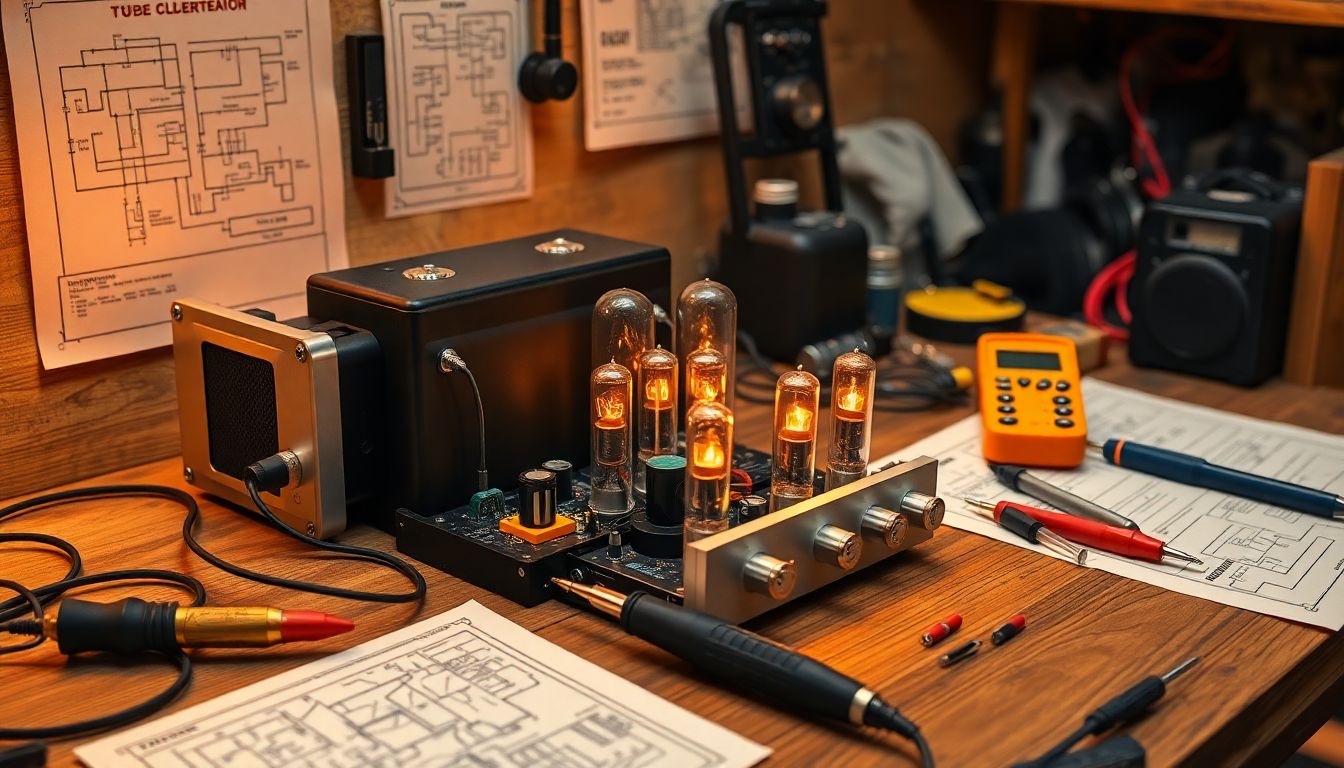
Understanding the Basics of Tube Amplifiers
What Is a Tube Amp?
Tube amps are those which utilize vacuum tubes to increase the sound from music. Electric signals are fed into glass tubes to be increased so as to power speakers or instruments. Tube amps are the crème de la crème because they give a sweeter, more musical sound, something that no solid-state amp can ever match. It is all about candlelight warmth compared to cold hard LED light — both light, but the first warm, intimate.
Major Pieces of a Tube Amp
Tubes (Preamp Tubes and Power Tubes): Sound and tone of the amp. Preamp tubes shape your tone, and power tubes propel it to where it would be heard.
Transformer: Get electricity via tubes and send signals to your speakers.
Resistors and Capacitors: Determining the current and filtering the signal, adding tone.
Chassis: Metal box in which all this sits.
Inputs and Outputs: Connect your mic, stereo gear, or guitar.
How a Tube Amp Works
It is in the input jack and is being recorded. It’s quiet in there like ten times, and it is at the whim of the bias and by the tubes. Tubes are on a principle of directing the electron stream, itsy bitsy signal to maximum sound power. Bias controls tone and gain, and you can alter the tone of the sound. It’s playing guitar — neat nice control does great things.
Planning Your Home-Brewed Tube Amp Project
Choosing the Right Type of Amp for Your Project
Determine what you want to play your amp. Distorted-clean-sounding guitar or warm-clean-sounding stereo hi-fi? Power needs are again in the size — a less than 5-watt amp would be fine for practice but the 50-watt would rattle the rafters. Weight and space are issues if you tour.
Schematics Design and Design Alternatives
Marshall-style or Fender Champ style amps are the newby favorite designs. They’re straightforward and everyone just loves ’em. Designs can be found on the net on sites such as DIYAudio or in books on single tube amp construction. Pay attention, reliability is the top concern, double check all schematics and sources.
Buying Materials and Equipment
Parts: High quality tubes, resistors, caps and transformers. JJ, Tung-Sol, and F&T are good.
Tools: Multimeter, soldering iron, wire stripper, and drill.
Safety First: Hazard, high voltage employed. Power-off always, and wear insulated gloves if necessary.
Building Your Tube Amp: Step-by-Step Instructions
Preparing Your Workspace
Clean, dry, open work area, tools within reach. Double check safety equipment: high-voltage caps still may transmit a shock after deenergizing. Safety glasses on, and hands dry.
Assembling the Circuit
Step by step trace out the diagram from power supply and subsequent preamp circuit. To be soldered is good sounding one and good sounding soldering technique has to be employed. Install the circuit in such a way that there should not remain any possibility of short circuit or interference.
Testing and Troubleshooting
Pre-final power-up, double check everything with your schematic. Multimeter voltage across and continuity test. Power up in steps when powering up. Tube pin outs, resistor values, and wiring need to be checked if it won’t power up. There are oscilloscopes available that can be used to check audio signals.
Final Assembly and Tuning
Mount all in chassis. Tube spec to your liking — both tone and tube life impacted. Tone to your taste, and experiment on live sound sources. Your tone test, number one, moment of glory!
Polishing and Personalizing Your Homebrew Tube Amp
Tone and Playing Performance Improvement Modding
You can also add effect loops or extra tone stacks to further experiment with your tone. Tube substitutions change tonality as well. Another tube substitution, i.e., instead of a dirty tube, will soften or brighten the tone.
Provide proper ventilation to prevent overheating. Clean the wires and tubes periodically. Dust every other time since it is a heat generator. Switch off when not in use to prevent accidental shock.
Sharing Your Work
Post your picture, diagram, and document your project. Share your project publicly or exhibit your project and invite people to give their feedback, suggestions, and learning. It is also a great way to inspire others and disseminate knowledge.
Professional Advice & Real-World Applications
Nearly but not quite all of the builder’s instructions but says an off-the-shelf schematic will suffice. Recent teardown of a Fender Champ by a builder, reworked as a nuts amp, and jury rigged tone control and effect testing is an exercise to show that selection of parts and selection of circuit design are what the project needs. Some of the production amp schematics are blank pages you fill in for your own amusement.
Conclusion
Home tube amp is a tone test. Tone is something you construct, and the test dares you to other electronics. Disassembling it piece by piece and reassembling it piece by piece makes it safe and enjoyable. Don’t hesitate to show off your masterpiece — DIY-ers would always love to show off masterpieces. Construct your own tube amp and listen to that great rich tone tubes can create without any other external!
So rock ready? Get your fins on a schematic, get your fins on some tubes, and take to the skies of adventure in creating your own DIY tube amp! The tech itself is sorta cool, and your tunes will be all the better because of it!